Saturday, December 12, 2009

How to remove ads from SBSettings

You have to install PHP and run this script
removeaps.php Select all

#!/usr/bin/php
<?
$filename = trim(shell_exec("find /Applications.* -type f -name SBSettings"));
$backup_filename = $filename.".bak";
$tmp_filename = $filename.".tmp";

while (file_exists($backup_filename)) {
$backup_filename .= ".bak";
}

if (!file_exists($filename)) {
die("Can't open: $filename\n");
}

copy($filename, $backup_filename);

echo "Patching file: $filename\n";
echo "Backup saved at: $backup_filename\n";

$fp = fopen($filename,"r");
$data = fread($fp, filesize($filename));
fclose($fp);

$data = str_replace('extra.thebigboss.org','extra.th4bigbo ss.org',$data);
$data = str_replace('mm.admob.com','mm.a4mob.com',$data);
$data = str_replace('r.admob.com','r.a4mob.com',$data);
$data = str_replace('ads.mobclix.com','ads.m4b4lix.com',$d ata);
$data = str_replace('a.qwapi.com','a.q4api.com',$data);
$data = str_replace('mydas.mobi','my4as.mobi',$data);

$fp = fopen($tmp_filename,"w");
fwrite($fp,$data);
fclose($fp);

shell_exec("ldid -s \"$tmp_filename\"");
shell_exec("mv \"$tmp_filename\" \"$filename\"");
shell_exec("chmod 4755 \"$filename\"");
echo "\nDone! :)\n";

?>


And you have to ldid -s /Applications/SBSettings.app/SBSettings

Wednesday, December 9, 2009

[How-to] dump yahoo weather city location codes for US

Here is the bash script to dump the location codes from weather.yahooapis.com

getcityloccode.sh Select all


#/bin/bash
for a in AL AK AZ AR CA CO CT DE DC FL GA HI ID IL IN IA KS KY LA ME MD MA MI MN MS MO MT NE NV NH NJ NM NY NC ND OH OK OR PA RI SC SD TN TX UT VT VA WA WV WI WY AS GU MP PR VI FM MH PW AA AE AP CZ PI TT CM ; do
countblank=0
for h in 0 1 2 3 4 5 6 7 8 9 ; do
for i in 0 1 2 3 4 5 6 7 8 9 ; do
for j in 0 1 2 3 4 5 6 7 8 9 ; do
for k in 0 1 2 3 4 5 6 7 8 9 ; do
locname=`curl -s -L "http://weather.yahooapis.com/forecastrss?p=US${a}${h}${i}${j}${k}&u=f" | grep "Yahoo! Weather for" | sed -e "s/\(^.*Yahoo! Weather for \)\(.*, ${a}\)\(.*\)/\2/"`
if [ "${locname}" != "" ] ; then
  echo US${a}${h}${i}${j}${k} $locname
  countblank=0
else
  countblank=$[$countblank+1]
  if [ $countblank -gt 5 ] ; then
    break 4
  fi
fi
done
done
done
done
done


and run it with
./getcityloccode.sh > cityloccodes.txt &

The results are

USAL0001 Abbeville, AL
USAL0002 Abernant, AL
USAL0003 Adamsville, AL
USAL0004 Addison, AL
USAL0005 Adger, AL
USAL0006 Akron, AL
USAL0007 Alabaster, AL
USAL0008 Alberta, AL
USAL0009 Albertville, AL
USAL0010 Alexander City, AL
...


Tuesday, December 8, 2009

Collection of 59 ebooks about Mac OSX

Collection of 59 ebooks about Mac OSX (1.35 GB)

List of these ebooks is below.
Addison Wesley – Cocoa Programming for Mac OS X 3rd Edition (2008).chm
Addison Wesley – Mac OS X Leopard Phrasebook (2007).chm
Addison Wesley – Step into Xcode Mac OS X Development (2006).pdf
Apress – Creating Mac Widgets with Dashcode.pdf
Apress – Foundations of Mac OS X Leopard Security (2008).pdf
Apress – Learn Objective-C on the Mac (2009).pdf
Apress – Mac for Linux Geeks (2008).pdf
Apress – Mac OS X Leopard, Beyond the Manual (2008).pdf
Dennis – The Independent Guide to the Mac 2nd edition (2009).pdf
Focal – Mac OS X for Photographers (2008).pdf
FriendsofED – Getting StartED with Mac OS X Leopard (2007).pdf
Macworld – Mac OS X Hints Leopard Edition (2008).pdf
MacWorld – Total Leopard, The Macworld OS X 10.5 Superguide (2008).pdf
Manning – Programming Mac OS X, A Guide For Unix Developers (2003).pdf
McGraw-Hill – How to Do Everything, Mac (2008).pdf
McGraw-Hill – Mac OS X Leopard QuickSteps (2008).pdf
New Riders – Mac OS X Leopard Killer Tips (2008).pdf
O’Reilly – Mac OS X Snow Leopard, The Missing Manual (2009).pdf
O’Reilly – Cocoa In A Nutshell (2003).pdf
O’Reilly – Essential Mac OS X Panther Server Administration (2005).chm
O’Reilly – Inside .Mac (2004).chm
O’Reilly – Mac OS X for UNIX Geeks (2003).pdf
O’Reilly – Mac OS X Hacks (2003).chm
O’Reilly – Mac OS X Leopard Pocket Guide (2007).chm
O’Reilly – Mac OS X Leopard, The Missing Manual (2007).chm
O’Reilly – Mac OS X Panther Hacks (2004).pdf
O’Reilly – Mac OS X Panther In A Nutshell 2nd Edition (2004).chm
O’Reilly – Mac OS X Snow Leopard Pocket Guide (2009).pdf
O’Reilly – Mac OS X Tiger for Unix Geeks (2005).chm
O’Reilly – Switching to the Mac, The Missing Manual Leopard Edition (2008).chm
Peachpit – Apple Training Series, Mac OS X Advanced System Administration v10.5 (2008).pdf
Peachpit – Apple Training Series, Mac OS X Deployment v10.5 (2008).pdf
Peachpit – Apple Training Series, Mac OS X Support Essentials 2nd Edition (2008).pdf
Peachpit – Mac OS X 10.5 Leopard, Peachpit Learning Series (2008).pdf
Peachpit – Mac OS X 10.5 Leopard, Visual QuickStart Guide (2008).pdf
Peachpit – Robin Williams Cool Mac Apps 2nd Edition (2005).chm
Peachpit – The Little Mac Book, Leopard Edition (2008).pdf
Premier – Mac OS X Power User’s Guide (2002).pdf
Que – Mac OS X Snow Leopard In Depth (2009).pdf
Que – Mac OS X Snow Leopard On Demand (2009).pdf
Que – Sleeping with the Enemy, Running Windows on a Mac (2006).chm
Que – Special Edition Using Mac OS X Leopard (2008).pdf
Sams – Mac OS X Tiger Unleashed (2005).chm
Sams – Teach Yourself Mac OS X Leopard All in One (2007).chm
Sams – Teach Yourself Mac OS X Tiger All in One (2005).chm
Sams – Xcode 3 Unleashed (2008).pdf
Sybex – Mac OS X Power Tools (2003).chm
Sybex – The Mac OS X Command Line, Unix Under the Hood (2005).pdf
Wiley – Cocoa Programming for Mac OS X For Dummies (2009).pdf
Wiley – MAC OS X Leopard Bible (2008).pdf
Wiley – Mac OS X Leopard, Just the Steps For Dummies (2007).pdf
Wiley – MAC OS X UNIX Toolbox (2009).pdf
Wiley – Mac OS X v 10.3 Panther, Top 100 Simplified Tips and Tricks (2004).chm
Wiley – MacBook Portable Genius (2009).pdf
Wiley – Macs All-in-One Desk Reference For Dummies (2008).pdf
Wiley – Macs For Dummies 8th Edition (2004).pdf
Wrox – Beginning Mac OS X Programming (2005).pdf
Wrox – Beginning Mac OS X Tiger Dashboard Widget Development (2006).pdf
Wrox – Beginning Xcode (2006).chm

Download
http://hotfile.com/dl/15057730/68b617b/Mac_OS_ebook_collection.part01.rar.html
http://hotfile.com/dl/15057787/1d29fcd/Mac_OS_ebook_collection.part02.rar.html
http://hotfile.com/dl/15057832/d83aca5/Mac_OS_ebook_collection.part03.rar.html
http://hotfile.com/dl/15057879/fc3b801/Mac_OS_ebook_collection.part04.rar.html
http://hotfile.com/dl/15057939/664a5b1/Mac_OS_ebook_collection.part05.rar.html
http://hotfile.com/dl/15057979/d7834d9/Mac_OS_ebook_collection.part06.rar.html
http://hotfile.com/dl/15058029/7f5a694/Mac_OS_ebook_collection.part07.rar.html
http://hotfile.com/dl/15058075/63a7a3d/Mac_OS_ebook_collection.part08.rar.html
http://hotfile.com/dl/15058126/66d2a22/Mac_OS_ebook_collection.part09.rar.html
http://hotfile.com/dl/15058183/595533c/Mac_OS_ebook_collection.part10.rar.html
http://hotfile.com/dl/15058415/fbdd174/Mac_OS_ebook_collection.part11.rar.html
http://hotfile.com/dl/15058478/a43d14e/Mac_OS_ebook_collection.part12.rar.html
http://hotfile.com/dl/15058539/195d3bb/Mac_OS_ebook_collection.part13.rar.html
http://hotfile.com/dl/15059551/1b71449/Mac_OS_ebook_collection.part14.rar.html

.
.
.
Monday, December 7, 2009

Remove print jobs in Mac OS X

Type this in Terminal to remove all print jobs

cancel -a -

Wednesday, November 25, 2009

Firewall iP v1.1-2 Cracked

Firewall iP v1.1-2 download
http://www.zshare.net/download/68956170edaa0e1f/

Requirement:
mobilesubstrate
firmware 3.0 or above
jailbreak iPhone/iPod Touch

Installation Method
(1) Put it in /var/root/Media/Cydia/AutoInstall/
(2) Restart your device

Description:
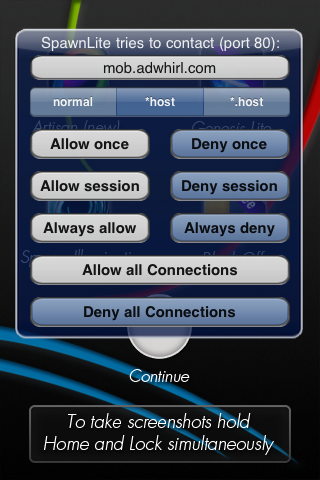
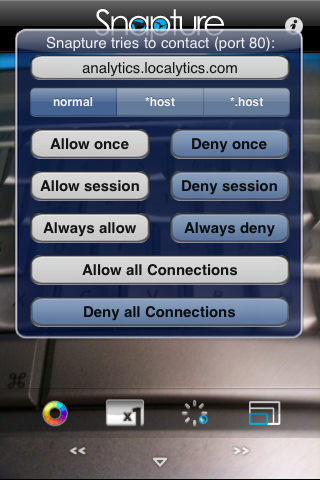
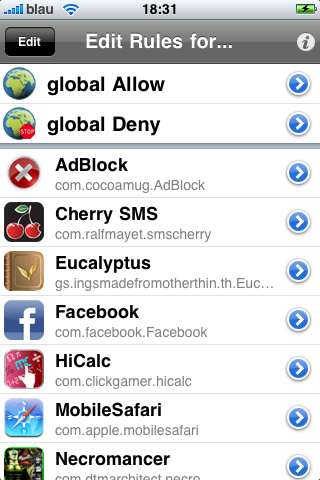
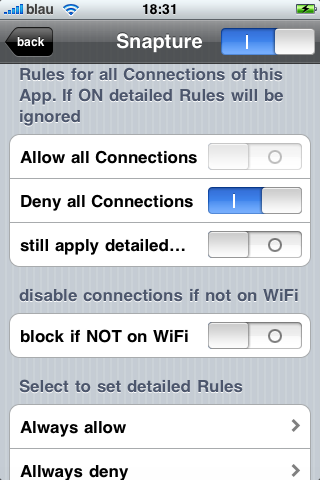
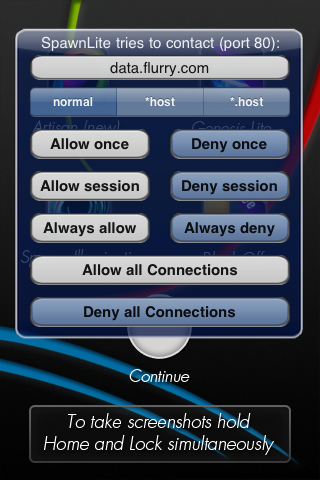
Decide yourself, Securtity for your iPhone and iPod touch Ony for iPhone OS 3.x Firewall iP allows you to block outgoing connections (TCP & UDP). It hooks into applications from AppStore and Cydia. Firewall iP will warn you if the app wants to establish a connection to a host and shows you the hostname. Then you have the options to allow/deny the connection once/always or allow/deny all connections for the application.

Screenshots:


Tuesday, November 24, 2009

How to fake or change iPhone Firmware Version


#backup SystemVersion.plist
cp -p /System/Library/CoreServices/SystemVersion.plist /System/Library/CoreServices/SystemVersion.plist.bak

#change product build version
plutil -key ProductBuildVersion -value 7C144 /System/Library/CoreServices/SystemVersion.plist
#Writing new value for ProductBuildVersion to /System/Library/CoreServices/SystemVersion.plist

#change product version number
plutil -key ProductVersion -value 3.1 /System/Library/CoreServices/SystemVersion.plist
#Writing new value for ProductVersion to /System/Library/CoreServices/SystemVersion.plist

#check firmware version number after change
plutil /System/Library/CoreServices/SystemVersion.plist


Firmware and Build Version
3.0 (7A341)
3.0.1 (7A400)
3.1 (7C144)
3.1.2 (7D11)
3.1.3 (7E18)
plutil -key ProductBuildVersion -value 7E18 /System/Library/CoreServices/SystemVersion.plist
plutil -key ProductVersion -value 3.1.3 /System/Library/CoreServices/SystemVersion.plist
.
.
.

Saturday, November 21, 2009

Google Apps and Google Sync to iPhone

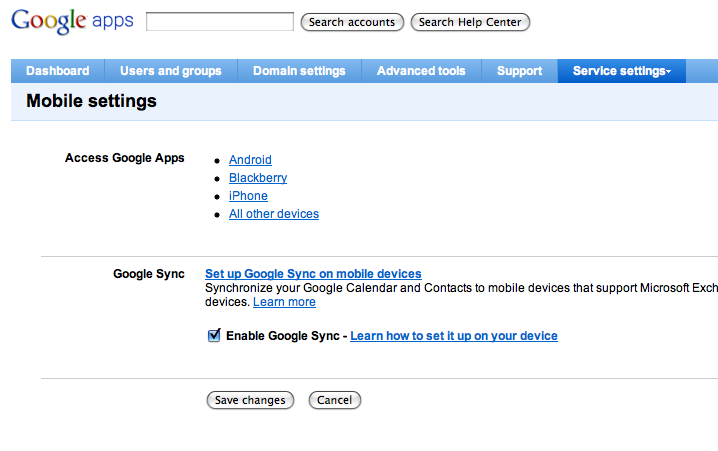
If you have google apps email (that is your own domain, you have to enable mobile sync in your google app dashboard


and follow this guide to enable google sync

http://www.knowliz.com/2009/02/how-to-sync-multiple-calendars-with.html


Thursday, November 19, 2009

Install git for Mac OS X Snow Leopard


mkdir ~/src
cd ~/src/
curl -O http://kernel.org/pub/software/scm/git/git-1.6.5.3.tar.bz2
tar -xjvf git-1.6.5.3.tar.bz2
cd git-1.6.5.3
./configure --prefix=/usr/local
make
sudo make install
git --version


This is how to create git-repo over ssh
suppose you have a project in ~/yourprojectdir
and the remote ssh server login is user@xxx.xxx.xxx.xxx
both client and server have git installed

Method 1

cd ~/yourprojectdir

git init

git add . # include everything below ./ in the first commit;
          # if you want to remove use git rm -r --cache xxx

git commit

cd ..

git clone --bare ~/yourprojectdir yourproject.git

touch yourproject.git/git-daemon-export-ok


then copy the git directory to your ssh sever

scp -r yourproject.git user@xxx.xxx.xxx.xx:/Volumes/HD/git/


setup git repo in ssh server

ssh user@xxx.xxx.xxx.xx "cd /Volumes/HD/git/yourproject.git; git --bare update-server-info; mv hooks/post-update.sample hooks/post-update"


check the location of remote git binary and the remote ssh login shell

ssh user@xxx.xxx.xxx.xxx "which git-upload-pack"
ssh user@xxx.xxx.xxx.xxx "echo \$PATH"

mine is /usr/local/bin/git-upload-pack


if the remote login shell does not include path of git, create ~/.bashrc in your remote ssh login shell

ssh user@xxx.xxx.xxx.xxx "echo 'export PATH=\${PATH}:/usr/local/bin' > ~/.bashrc"


push to remote git repo

cd ~/yourprojectdir

git remote add origin ssh://user@xxx.xxx.xxx.xxx/Volumes/HD/git/yourproject.git

git push origin master


Method 2

Create git repo in remote server

ssh user@xxx.xxx.xxx.xxx "mkdir -p /Volumes/HD/git/yourproject.git; cd /Volumes/HD/git/yourproject.git; git --bare init; touch git-daemon-export-ok"


Check the location of remote git binary and the remote ssh login shell as per Method 1

Commit project in your local and push to git repo

cd ~/yourprojectdir

git init

git add . # include everything below ./ in the first commit;
          # if you want to remove use git rm -r --cache xxx

git commit

git remote add origin ssh://user@xxx.xxx.xxx.xxx/Volumes/HD/git/yourproject.git

git push origin master


Test git clone

cd ~
git clone ssh://user@xxx.xxx.xxx.xxx/Volumes/HD/git/yourproject.git working
cd working
git log
git checkout


How to Branch

git branch -r # show branch in repo
git checkout -b todo origin/to-do-branch # checkout a new branch
git checkout master # checkout the master branch

git branch next # create new branch
git add .
git commit -m 'commit nextbranch'
git push origin next


How to fetch Branch from github repo

git clone git://github.com/username/repo-name.git
cd repo-name
git branch -r # show branch in repo
git checkout origin/to-do-branch # quick peek at an upstream branch
git checkout -b todo origin/to-do-branch # checkout a new tracking branch


To fetch a remote from github pull request # into your local repo

git fetch origin pull/<ID #>/head:NEWBRANCHNAME
git checkout NEWBRANCHNAME


Others
git config user.name "yourname"
git config user.email "your email"
git init .
git rebase -i
git commit --amend --author="Author Name "
git diff --stat
git diff --word-diff
git log --pretty='%h %d %s (%cr) [%an]' --graph --all
git config --global alias.lg "log --pretty='%Cred%h%Creset %C(yellow)%d%Creset %s %Cgreen(%cr)%Creset %C(cyan)[%an]%Creset' --graph --all"


For subversion, it is here
http://subversion.apache.org/download/#recommended-release


Tuesday, November 17, 2009

How to create an iso image with mkisofs in cygwin


 mkisofs -iso-level 2 -J -R -l -D -N -joliet-long \
 -relaxed-filenames -V "yourlabel" \
 -o yourcd.iso yourdirectory

Saturday, November 14, 2009

appulous who am i ?

the answer is
kyek

What was the name of Hackulous' April Fool's Day app?
Winulous

Hackulous started off as ___________.net?
Geniusblog

The very first public forum dedicated specifically to iPhone 2.0 app cracking was hosted at ___________.com?
haklabs

Who is the cracker most credited with discovering the cracking method we use today?
lsemtex

Who was the admin of Hakstore?
labrat

Who wrote the very first autocracking BASH script?
Flox

__________4fun
b00sted

__________aasdf
bugmenot

What is Haklab's favorite food?
P e n i s

I work for Apple's law firm and have been trying to get Appulous shut down since the beginning.
ian ramage

Who did Labrat attempt to con into writing a private Appulous clone for his website? (It wasn't Hoover Dam.)
andydam


http://iphoneaddict.fr/index.php?post/2009/11/14/Le-site-Appulous-est-desormais-protege-par-un-mot-de-passe

There is a trick to use google search engine cache
e.g. enter this into the google search box
sims site:appulo.us

Friday, November 13, 2009

Parallels Desktop 5 Serial

Parallels Desktop 5
GC956T-XQN1ZM-MG0JC0-3B3JRT-XZTW2T

P1RR7C-A90J0A-0H1HPB-7FENCD-S4MBSG

http://download.parallels.com/desktop/v5/en_us/parallels/ga/ParallelsDesktop-parallels-en_US-5.0.9220.531002.dmg

Update 2009/12/26
Parallels Desktop 5.0

GC956T-XQN1ZM-MG0JC0-3B3JRT-XZTW2T
windup key QC986-27D34-6M3TY-JJXP9-TBGMD

Update 2010/3/17
Parallels Tools Iso latedSoul5591 (MAC)
http://hotfile.com/dl/32232886/c6e763a/Parallel_Tools_IsolatedSoul5591.rar.html

Update 2010/4/26
Parallels Desktop 5.0.9344.558741
http://download.parallels.com/desktop/v5/en_us/parallels/update3/ParallelsDesktop-parallels-en_US-5.0.9344.558741.dmg

Serial No
First:
GFB577-DDJJ9A-VGPP47-EAB1YR-EEQDMJ
After:
MJZQ7R-CNDVAJ-605Z8C-2VC1CN-PXQC5T


Parallels Desktop 6
KRHPFX-CPGPAN-CG13A9-W7VW5S-AS1794

NQT0GS-BS73JA-B03MF3-DBR8F6-58ZJWA

Download here http://download.parallels.com/desktop/v6/en_us/parallels/ga/ParallelsDesktop-parallels-en_US-6.0.11820.602974.dmg

http://download.parallels.com/desktop/v6/en_us/parallels/update2/ParallelsDesktop-parallels-en_US-6.0.12090.660720.dmg

Add these in /etc/hosts to block activation
127.0.0.1 registration.parallels.com
127.0.0.1 pd6.blist.parallels.com


Parallels Desktop 7
Parallels Desktop 7 Download (with Lion virtualization and more)
http://download.parallels.com/desktop/v7/ga/ParallelsDesktop-7.0.14920.689535.dmg

Add these in /etc/hosts to block activation before installation (must do this before starting installation)
127.0.0.1 pd6.blist.parallels.com
127.0.0.1 pd7.blist.parallels.com
127.0.0.1 pdfm7.blist.parallels.com
127.0.0.1 registration.parallels.com
127.0.0.1 parallels.com
127.0.0.1 update.parallels.com


Serial No:
KM7SW A-D0V7WH-40CFX7-WS815F-YV0QRR

Don't Register

.
.

Tuesday, November 10, 2009

Windows 7 Product Key

22TKD-F8XX6-YG69F-9M66D-PMJBM

Sunday, November 1, 2009

[How-to] install Debian and openssh server in T-Mobile G1

Assume you have installed CynogenMod and get busybox in it, you can install Debian system in G1 or other Android phone that has been rooted and have busybox in that custom ROM.

The instruction of setting up debian in G1 is in saurik's site here http://www.saurik.com/id/10
But some of the information are outdated, as the rooting is very simple now and the busybox comes with all custom cooked ROMs.

I like this method as the Debian system is installed in a standalone img file which can be copied to other Android phones.

(1) Download the Debain G1 image here
http://modmygphone.com/files/debian-G1.zip

or
http://rapidshare.com/files/161776007/debian-armel-750.img.bz2

unzip bz2 file with
bunzip2 debian-armel-750.img.bz2

(2) unzip it and copy the img file to sdcard. The image is 750M in size, so make sure you have enough space in sdcard.
adb push debian-armel-750.img /sdcard/kit/

(3) su shell access into G1

adb shell
su


(4) setup mount and chroot

export kit=/sdcard/kit
export mnt=/data/local/mnt
export TERM=linux
export HOME=/root
export PATH=$bin:/usr/bin:/usr/sbin:/bin:$PATH

busybox clear

busybox mkdir -p $mnt

busybox mount -o loop,noatime $kit/debian-armel-750.img $mnt

busybox mount -t devpts devpts $mnt/dev/pts
busybox mount -t proc proc $mnt/proc
busybox mount -t sysfs sysfs $mnt/sys

busybox mkdir -p $mnt/mnt
busybox mkdir -p $mnt/mnt/sdcard $mnt/mnt/system
busybox mkdir -p $mnt/mnt/data $mnt/mnt/dev

busybox mount --bind /sdcard $mnt/mnt/sdcard
busybox mount --bind /system $mnt/mnt/system
busybox mount --bind /data $mnt/mnt/data
busybox mount --bind /dev $mnt/mnt/dev
busybox mount -t tmpfs tmpfs $mnt/tmp -o noatime,mode=1777


busybox chroot $mnt /bin/bash
# now G1 should be in Debian System

rm -f /etc/mtab
ln -s /proc/mounts /etc/mtab


(5) change root password and install OpenSSH and start it

passwd root

apt-get install debian-keyring debian-archive-keyring
apt-get update
apt-get upgrade
apt-get install openssh-server openssh-client
/etc/init.d/ssh start


(6) If the default package source does not work, you can change this file /etc/apt/sources.list to

deb http://ftp.us.debian.org/debian lenny main


(7) if you want to install gcc compiler

apt-get install build-essential


(8) exit the debian system
exit

(9) Before you proceed to copy the Debian system to the /system/sd, please consider to check the partition size of /system/sd first. If you want to manually increase the ext2 partition size, please follow this guide below. Please backup before re-partition as the process will wipe your sdcard data.

http://forum.xda-developers.com/showthread.php?t=534714

This how you can backup the /system/sd and sdcard

adb pull /system/sd/app app
adb pull /system/sd/app-private app-private
adb pull /system/sd/dalvik-cache dalvik-cache
adb pull /sdcard sdcard


and this is how you restore data after repartition the sdcard (remember this is when the phone is booted up and not in recovery mode

adb push app /system/sd/app
adb push app-private /system/sd/app-private
adb push dalvik-cache /system/sd/dalvik-cache
adb push sdcard /sdcard


(10) Reboot G1
reboot

(11) Copy the Debian system to /system/sd if you use CynogenMod ROM and have ext2 partition in the sdcard

cd /data/local/mnt
tar cf - . | (cd /system/sd/; tar xvf -)


(12) create the mount script as /system/sd/userinit.sh

export mnt=/system/sd

export TERM=linux
export HOME=/root

busybox mount -t devpts devpts $mnt/dev/pts
busybox mount -t proc proc $mnt/proc
busybox mount -t sysfs sysfs $mnt/sys

busybox mount --bind /sdcard $mnt/mnt/sdcard
busybox mount --bind /system $mnt/mnt/system
busybox mount --bind /data $mnt/mnt/data
busybox mount --bind /dev $mnt/mnt/dev


append this script if you want to start ssh server automatically
busybox chroot /system/sd /etc/init.d/ssh start

(12) Reboot G1
reboot


(13) Then you can ssh to your G1 by using ssh root@xxx.xxx.xxx.xxx after enable wifi in G1, where xxx.xxx.xxx.xxx is the IP address of G1.


This is how you chroot manually when you use adb shell access
chroot /system/sd /bin/bash


Thursday, October 29, 2009

Android NDK Makefile

(1) install NDK 1.6 in say
~/Android/android-ndk-1.6_r1

download http://developer.android.com/sdk/ndk/1.6_r1/index.html

(2) install SDK 1.6 in say
~/Android/android-sdk-linux_x86-1.6_r1

download http://developer.android.com/sdk/1.6_r1/index.html

(3) you can compile standalone C program like this hello.c using the Makefile below

#include <stdio.h>
int main() {
  printf("hello, NDK makefile world\n");
  return 0;
}


(4) Create Makefile
Makefile Select all

APP=hello

NDK_DIR := /cygdrive/c/Android/android-ndk-1.6_r1
#NDK_DIR := ~/Android/android-ndk-1.6_r1
NDK_HOST := windows
#NDK_HOST := linux-x86
#NDK_HOST := darwin-x86
SDKTOOL := /cygdrive/c/Android/android-sdk-windows-1.6_r1/tools
#SDKTOOL := ~/Android/android-sdk-linux_x86-1.6_r1/tools
#SDKTOOL := ~/Android/android-sdk-mac_x86-1.6_r1/tools

TOOLCHAIN_PREFIX := $(NDK_DIR)/build/prebuilt/$(NDK_HOST)/arm-eabi-4.2.1/bin/arm-eabi-
CC := $(TOOLCHAIN_PREFIX)gcc
CPP := $(TOOLCHAIN_PREFIX)g++
LD := $(CC)

COMMON_FLAGS := -mandroid -ffunction-sections -fdata-sections -Os -g --sysroot=$(NDK_DIR)/build/platforms/android-4/arch-arm \
-fPIC \
-fvisibility=hidden \
-D__NEW__

CFLAGS := $(COMMON_FLAGS)

CFLAGS += -D__ARM_ARCH_5__ -D__ARM_ARCH_5T__ -D__ARM_ARCH_5E__ -D__ARM_ARCH_5TE__ -DANDROID -DSK_RELEASE -DNDEBUG

CFLAGS += -UDEBUG -march=armv5te -mtune=xscale -msoft-float -mthumb-interwork -fpic -ffunction-sections -funwind-tables -fstack-protector -fmessage-length=0 -Bdynamic


CPPFLAGS := $(COMMON_FLAGS) \
-fno-rtti -fno-exceptions \
-fvisibility-inlines-hidden

LDFLAGS += --sysroot=$(NDK_DIR)/build/platforms/android-4/arch-arm
LDFLAGS += -Bdynamic -Wl,-dynamic-linker,/system/bin/linker -Wl,--gc-sections -Wl,-z,nocopyreloc
LDFLAGS += -L$(NDK_DIR)/build/prebuilt/$(NDK_HOST)/arm-eabi-4.2.1/lib/gcc/arm-eabi/4.2.1/android
LDFLAGS += -L$(NDK_DIR)/build/prebuilt/$(NDK_HOST)/arm-eabi-4.2.1/lib/gcc/arm-eabi/4.2.1
LDFLAGS += -L$(NDK_DIR)/build/prebuilt/$(NDK_HOST)/arm-eabi-4.2.1/lib/gcc
LDFLAGS += -L$(NDK_DIR)/build/prebuilt/$(NDK_HOST)/arm-eabi-4.2.1/arm-eabi/lib
LDFLAGS += -nostdlib -lc -llog -lgcc \
--no-undefined -z $(NDK_DIR)/build/platforms/android-4/arch-arm/usr/lib/crtbegin_dynamic.o $(NDK_DIR)/build/platforms/android-4/arch-arm/usr/lib/crtend_android.o

OBJS += $(APP).o

all: $(APP)

$(APP): $(OBJS)
$(LD) $(LDFLAGS) -o $@ $^

%.o: %.c
$(CC) -c $(CFLAGS) $< -o $@

%.o: %.cpp
$(CPP) -c $(CFLAGS) $(CPPFLAGS) $< -o $@

install: $(APP)
$(SDKTOOL)/adb push $(APP) /data/local/bin/$(APP)
$(SDKTOOL)/adb shell chmod 755 /data/local/bin/$(APP)

run:
$(SDKTOOL)/adb shell /data/local/bin/$(APP)

clean:
@rm -f $(APP).o $(APP)


(5) connect device and test using

make all
make install run


(6) compile C++ program example1.cpp (no STL)

make APP=example1 all install run


example1.cpp Select all

#include <stdio.h>

class counter {
public:
int some_data;
char some_other_data[100];
int i;

void increment_counter() {i++;}
void decrement_counter() {i--;}
int query_counter() {return i;}

void set_counter(int new_value);
};

void counter::set_counter(int new_value)
{
i = new_value;
}

main()
{
counter apples;
counter oranges;
counter *pointer_to_counter = NULL;
counter array_of_counters[10];
int x = 5;

apples.some_data = x;

apples.set_counter(10);
apples.increment_counter();

oranges.set_counter(5);
oranges.decrement_counter();

printf("%d apples and %d oranges\n",
apples.query_counter(),
oranges.query_counter());
}


Saturday, October 24, 2009

Android NDK add stlport and compile C++ program

(1) Assume you have Android ndk 1.6 and your ndk directory is in ~/Android/android-ndk-1.6_r1 and you are using mac
download ndk-wrapper from

cd ~/Android
git clone git://umbel.mooo.com/ndk-wrappers.git


reference
http://umbel.mooo.com/git?p=ndk-wrappers.git;a=summary

(2) Edit ~/Android/ndk-wrappers/setup.sh and add these

export HOST=darwin-x86
export NDK_DIR=~/Android/android-ndk-1.6_r1
export NDK_WRAPPERS_BASE=~/Android/ndk-wrappers


(3) Edit ~/Android/ndk-wrappers/scripts/build-stlport.sh ad add these

export NDK_WRAPPERS_BASE=~/Android/ndk-wrappers
export PATH=~/Android/ndk-wrappers/bin:$PATH


(4) Edit ~/Android/ndk-wrappers/scripts/env-utils.sh and change / add these

SYSROOT="${NDK_DIR}/build/platforms/android-4/arch-arm"
HOST=darwin-x86


For linux
HOST=linux-x86

For CYGWIN
HOST=windows

(5) Change ~/Android/ndk-wrappers/stlport/build/lib/android.mak
from

--sysroot=$(NDK_DIR)/build/platforms/android-1.5/arch-arm \


to

--sysroot=$(NDK_DIR)/build/platforms/android-4/arch-arm \


(6) Add link

cd ~/Android/ndk-wrappers/stlport/build/Makefiles/gmake
ln -s linux arm-linux


(7) For Mac only, upgrade sed using Mac port

sudo port install gsed
sudo ln -s /opt/local/bin/gsed /opt/local/bin/sed


(8) build stlport

cd ~/Android/ndk-wrappers
export NDK_DIR=~/Android/android-ndk-1.6_r1
./setup.sh


(9) Create hello.cpp to test

#include <iostream>
using namespace std;
int main() {
  cout << "hello, world\n";
  return 0;
}


(10) Compile

~/Android/ndk-wrappers/bin/arm-linux-g++ -o hello hello.cpp -L~/Android/ndk-wrappers/stlport/build/lib/obj/arm-linux-gcc/so


(11) Sent to device for testing

adb push hello /data/local/bin/hello
adb shell chmod 755 /data/local/bin/hello
adb shell /data/local/bin/hello


You can use Makefile
Makefile Select all

APP := hello
SDKTOOL := ~/Android/android-sdk-mac_x86-1.6_r1/tools
WRAPPER := ~/Android/ndk-wrappers
STLLIB := -L~/Android/ndk-wrappers/stlport/build/lib/obj/arm-linux-gcc/so
BIN := $(WRAPPER)/bin
CPP := $(BIN)/arm-linux-g++
CC := $(BIN)/arm-linux-gcc

all: $(APP)

OBJS += $(APP).o

$(APP): $(OBJS)
$(CPP) $(LDFLAGS) -o $@ $(STLLIB) $^

%.o: %.c
$(CC) -c $(INCLUDE) $(CFLAGS) $< -o $@

%.o: %.cpp
$(CPP) -c $(INCLUDE) $(CFLAGS) $(CPPFLAGS) $< -o $@

install: $(APP)
$(SDKTOOL)/adb push $(APP) /data/local/bin/$(APP)
$(SDKTOOL)/adb shell chmod 755 /data/local/bin/$(APP)

shell:
$(SDKTOOL)/adb shell

run:
$(SDKTOOL)/adb shell /data/local/bin/$(APP)

clean:
@rm -f $(APP).o $(APP)


Tuesday, October 6, 2009

Sunday, September 13, 2009

default write

Disable iTunes Device backup

defaults write com.apple.iTunes DeviceBackupsDisabled -bool true

Sunday, July 19, 2009

Fix SSH timeout for jailbreak iPhone

Login iPhone and edit /etc/ssh/sshd_config and change the line

from

#ClientAliveInterval 0

to

ClientAliveInterval 60

According to man sshd_config, this line,

Sets a timeout interval in seconds after which if no data has been received from the client, sshd(8) will send a message through the encrypted channel to request a response from the client. The default is 0, indicating that these messages will not be sent to the client. This option applies to protocol version 2 only.

Don’t forget to restart sshd on the iPhone after you save the file.

Thursday, July 16, 2009

WinRAR v3.80 Serial Number

WinRAR v3.80

choose either one of them
create a document called rarreg.key and put it in C:\Program Files\WinRAR
=================================================
WinRAR v3.80 Select all

RAR registration data
Federal Agency for Education
1000000 PC usage license
UID=b621cca9a84bc5deffbf 6412612250ffbf533df6db2dfe8ccc3aae5362c06d54762105357d 5e3b1489e751c76bf6e0640001014be50a52303fed29664b074145 7e567d04159ad8defc3fb6edf32831fd1966f72c21c0c53c02fbbb 2f91cfca671d9c482b11b8ac3281cb21378e85606494da349941fa e9ee328f12dc73e90b6356b921fbfb8522d6562a6a4b97e8ef6c9f fb866be1e3826b5aa126a4d2bfe9336ad63003fc0e71c307fc2c60 64416495d4c55a0cc82d402110498da970812063934815d81470829275


=================================================
WinRAR v3.80 Select all

RAR registration data
Database Administrators
5 PC usage license
UID=54d582e921e445f1bfe8 6412212250bfe8e73e20bdb947f60ef0da9624150bcf8668412c68 84affda559742bbb686d6071302587655a7ba28d516e17834b7616 47cd79a293eb4c0e4fbf5e9f967e6ed5b28a02418d0ab2549fc4da 19e4644f2345190bf26ff7bcd0c819f12560b57cf28adc164a00c6 3174fcbb69509912e7c7c4793779b941901c6c793b7319cc395ee0 8bddb923fa08fc20019b59d0b246e0ac325d2e5854d4f97a602fc0 a4357b8f857cfb717545410ecad088fb28a2a3cf0dff2102863273


=================================================
WinRAR v5.x (32 / 64 bits)Select all
RAR registration data
DigitalConduct
Unlimited Company License
UID=50ffc598a5a2f6862abb 64122122502abbc84c39c3419cc42c830c7918bd06eb387ba39db0 c2e20d6aee1b3d045ed860fce6cb5ffde62890079861be57638717 7131ced835ed65cc743d9777f2ea71a8e32c7e593cf66794343565 b41bcf56929486b8bcdac33d50ecf7739960a8bc2f89179193e346 00ba2270daa5b65a7909ecfb8130b60452eabf07f1a805749a4b6b 1571bc8a47789bc120ff2b6ae77e980ce8b5af8cd45d8be260f16e 3df7bf450991bde61f43b36a2096f010e0d232d4331c1958956325


=================================================
For Windows 10 and WinRAR 5.9/6.01
notepad C:\Users\%USERNAME%\AppData\Roaming\WinRAR\rarreg.key
WinRAR v5.9 (64 bits) Windows 10     Select all
RAR registration data SeVeN Unlimited Company License UID=000de082d4cb7aebb1d7 6412212250b1d762e38f07647568de8cced6309ae961b9eb1ed950 a0d588193eea605f7ed160fce6cb5ffde62890079861be57638717 7131ced835ed65cc743d9777f2ea71a8e32c7e593cf66794343565 b41bcf56929486b8bcdac33d50ecf77399603440fd770694ebb26e 46c22a9c4a7903ca551e2eaef3a0ce8b8f8d29fa89bf8fabeb717f 2846e0e0346d2d9c68b9f5e25e381ab74c3e10640614a5dc607ec5 3c67604588e161f9ce5f6cf3ea01a7466cfbb6147b223047701380


Monday, July 13, 2009

MCleaner 1.8 Activation Code

(1) Start gdb in iPhone SSH putty session

gdb


(2) Enter these in gdb

break *0x00003320
break *0x00003348
commands 1
silent
print $r4
set $pc=0x3328
continue
end
commands 2
silent
printf "\n\n\nSERIAL:%c%c%c%c%c%c%c%c! ENJOY!\n\n\n",$1,$2,$3,$4,$5,$6,$7,$8
end
attach -waitfor MCleaner


(3)Start MCleaner in iPhone

(4) In gdb type continue and press enter

(5) Enter Activation code in MCleaner with 8 zeros that is 00000000

(6) Then gdb will show the real activation code on gdb screen like
SERIAL:99999999!ENJOY!

(7) Remember that 8 digits number and reenter it again when activation in MCleaner


Wednesday, June 24, 2009

vfdecrypt key iPhone 3GS

Download
http://appldnld.apple.com.edgesuite.net/content.info.apple.com/iPhone/061-6582.20090617.LlI87/iPhone2,1_3.0_7A341_Restore.ipsw

vfdecrypt key is
7D779FED28961506CA9443DE210224F211790192B2A2308B8BC0E7D4A2CA61A68E26200E

The command is

curl -O http://appldnld.apple.com.edgesuite.net/content.info.apple.com/iPhone/061-6582.20090617.LlI87/iPhone2,1_3.0_7A341_Restore.ipsw
unzip iPhone2,1_3.0_7A341_Restore.ipsw 018-5302-002.dmg
vfdecrypt -i 018-5302-002.dmg -o 3gs.dmg -k 7D779FED28961506CA9443DE210224F211790192B2A2308B8BC0E7D4A2CA61A68E26200E

Sunday, June 14, 2009

A better HTC Magic Android Emulator Skin

You might have found a HTC Magic Skin for the Android Emulator, but the button positions are wrong and I have modified it to reflect my actual HTC Magic device.

You can download from here


Screenshot

Wednesday, May 20, 2009

How to send Alt-X in Mac Terminal

You need to configure the mac 'terminal' application so the 'alt / option' key sends 'meta'. In order to do this, go to:

Terminal > Preferences > Settings > Keyboard

and select the 'Use option as meta key' checkbox at the bottom of the window.

Saturday, May 2, 2009

Wednesday, April 29, 2009

Wednesday, April 15, 2009

How-to decrypt iPhone OS 3.0 beta filesystem

The procedure is a step by step example for Mac to decrypt iPhone OS 3.0 beta2 (3G) iPhone1,2_3.0_7A259g_Restore.ipsw

(1) get the tools here

vfdecrypt http://rgov.org/files/vfdecrypt-mac.zip
or here http://code.google.com/p/iphone-elite/downloads/list

P.S. If you compile the vfdecrypt in Mac (sourre code here), you need to amend two things
(a) As Mac OS X does not have byteswap.h


#if HAVE_BYTESWAP_H
#include <byteswap.h>
#else
#define bswap_16(value) \
((((value) & 0xff) << 8) | ((value) >> 8))

#define bswap_32(value) \
(((uint32_t)bswap_16((uint16_t)((value) & 0xffff)) << 16) | \
(uint32_t)bswap_16((uint16_t)((value) >> 16)))

#define bswap_64(value) \
(((uint64_t)bswap_32((uint32_t)((value) & 0xffffffff)) \
<< 32) | \
(uint64_t)bswap_32((uint32_t)((value) >> 32)))
#endif


(b) change this line 357 to
while((c = getopt(argc, argv, "hvi::o::p:k::")) != -1){

xpwntool http://www.zdziarski.com/iphone-forensics/v2.x-Base/Xpwn/
or
img3decrypt http://code.google.com/p/img3decrypt/downloads/list

(2) compile genpass.c

get the source file here http://www.theiphonewiki.com/wiki/index.php?title=GenPass

or updated source here http://github.com/posixninja/genpass

First, download OpenSSL from here:
http://www.openssl.org/source/openssl-0.9.8h.tar.gz
curl -O http://www.openssl.org/source/openssl-0.9.8h.tar.gz

Untar it, and cd to the directory it is in, in Terminal. Then, type:
tar -xzvf openssl-0.9.8h.tar.gz
cd openssl-0.9.8h
./config && make


After that, rename the directory to "openssl" instead of "openssl(version)"

cd ..
mv openssl-0.9.8h openssl


As long as the "openssl" folder is in the directory you are building this in,
you should be able to now compile it with:

gcc genpass.c openssl/libcrypto.a -o genpass -I openssl/include/

(3) unzip the ram disk from firmware file

unzip iPhone1,2_3.0_7A259g_Restore.ipsw 018-4877-7.dmg

(4) decrypt ramdisk

./xpwntool 018-4877-7.dmg ramdisk.dmg -k 875CACE71C62CDA899D1C22C60466170 -iv DC4D3E13D9CB5F7CDC504DB6B5AB137D

(5) unzip root filesystem from ipsw file

unzip iPhone1,2_3.0_7A259g_Restore.ipsw 018-4872-6.dmg

(6) use genpass to get vfdecrypt key

./genpass s5l8900x ramdisk.dmg 018-4872-6.dmg


platform = , s5l8720x (for ipod2g), s5l8920x (for iphone3gs), s5l8922x (for
ipod3g), or s5l8930 (for ipad1g)


Platform is the applications processor (i.e. S5L8900X, S5L8720X, S5L8920X, S5L8922X, S5l8930) but in small caps
s5l8900x = iPhone, iPhone 3G and iPod Touch 1G
s5l8720x = iPod Touch 2G
s5l8920x = iPhone 3GS
s5l8922x = iPod Touch 3G
s5l8930 = A4 Processor used by iPad, iPhone 4, and iPod Touch 4G

(7) decrypt root filesystem

./vfdecrypt -i 018-4872-6.dmg -o beta2_3g_rootfs.dmg -k 59A86B5A4FCC76FCADE07FDDF72C72D36A6E105BC0C727F508F2B1313EB1B74D97CA8A81

You can get the 3.0 OS beta keys here
http://www.theiphonewiki.com/wiki/index.php?title=VFDecrypt_Keys:_3.x


Sunday, April 12, 2009

pthread_cancel in POSIX thread

Here is an example to use pthread_cancel in POSIX thread programming.

cancelthread.c Select all

#include <stdio.h>
#include <pthread.h>

void cleanup_routine(void *arg)
{
int *c = (int*)arg;
printf("ThreadCleanup: cleanup called at counter %d\n", *c);
}

void *threadFunc(void *arg)
{
char *str;
int i = 0;
int oldstate;
int retval;

pthread_cleanup_push(cleanup_routine, &i);

pthread_setcancelstate (PTHREAD_CANCEL_ENABLE, &oldstate);

str=(char*)arg;
i = 0;
while(i < 110 )
{
usleep(1);
printf("threadFunc says: %s %d\n",str,i);
if ((i % 10)==0) {
pthread_testcancel();
printf("pthread_testcancel\n");
}
++i;
}
pthread_cleanup_pop(0);
return NULL;
}

int main(void)
{
pthread_t pth; // this is our thread identifier
pthread_attr_t attr;
void *result;
int status;
int join_status;
int i = 0;
/* Initialize and set thread detached attribute */
pthread_attr_init(&attr);
pthread_attr_setdetachstate(&attr, PTHREAD_CREATE_JOINABLE);

pthread_create(&pth,&attr,threadFunc,"foo");

while(i < 100)
{
usleep(1);
printf("main is running... %d\n",i);
if (i==20) {
printf("thread is terminating...\n");
status = pthread_cancel(pth);
break;
}

++i;
}

printf("main waiting for thread to terminate...\n");
status = pthread_join(pth,&result);
if (status != 0)
printf("Error: Join thread");
if (result == PTHREAD_CANCELED)
printf ("Thread canceled at iteration\n");
else
printf ("Thread was not canceled\n");
printf("main with thread terminated\n");

return 0;
}


Saturday, March 28, 2009

Mac OS X : suddenly disappear Chinese Input Methods

This is the method to solve the problem

(1) Create a newuser and see if the Input Method can be selected in International Preference

(2) If the newuser can access the Input Method, then it is preference setting problem

(3) login the newuser and copy the following files from folder ~/Library/Preferences to in a common folder
com.apple.systempreferences.plist
TCIMHaninUserDictionary
com.apple.inputmethod.TCIM.plist

(4) login the olduser and copy the above files back to ~/Library/Preferences

(5) Reboot Mac
.
.
.

Tuesday, February 10, 2009

How to decrypt iPhone IPA file

Decrypted IPA
Please take note that you don't need this method to decrypt the IPA file, if you already have the decrypted one downloaded from the net. This method applies to the app that you have directly purchased from App Store and want to decrypt it in order to be useful for others.

One of the decrypt methods is to use a jailbreak iPhone and run the script (source from pr0x.org Forum) below in iPhone to create the decrypted ipa.

To use this method you must have installed the app from App Store in jailbreak iPhone plus the following packages from Cydia
com.ericasadun.utilities gdb gawk zip ldid odcctools

Use the following commands in iPhone to install, if you don't like to use Cydia.
apt-get install com.ericasadun.utilities gdb gawk zip ldid odcctools

To find out the app names that your iPhone have installed, run this command in iPhone
find /var/mobile/Applications/ -iname *.app

and use this command to generated the decrypted ipa e.g.
./DCrypt.sh "Monkey Ball"


DCrypt.sh Select all

#!/bin/sh
#
# DeCrypt - v1.1 (2008-10-21)
# - v1.1 (2008-10-21)
# FloydianSlip
#
# Heavily based on xcrack
#
# Many thanks to:
# puy0, SaladFork, Flox, Flawless
#

echo "DeCrypt 1.1 (2008-10-21)"
echo "FloydianSlip"
echo

if [ ! -e /usr/bin/plutil ]; then
echo "Cannot find plutil (apt-get install com.ericasadun.utilities)"
exit 1
fi

if [ ! -e /usr/bin/gdb ]; then
echo "Cannot find gdb (apt-get install gdb)"
exit 1
fi

if [ ! -e /usr/bin/otool ]; then
echo "Cannot find otool (apt-get install odcctools)"
exit 1
fi

if [ ! -e /usr/bin/ldid ]; then
echo "Cannot find otool (apt-get install ldid)"
exit 1
fi


if [ ! -e /usr/bin/awk ]; then
echo "Cannot find awk (apt-get install gawk)"
exit 1
fi

if [ ! -e /usr/bin/zip ]; then
echo "Cannot find zip (apt-get install zip)"
exit 1
fi

if [ $# -ne 1 ]; then
echo "Usage: $(basename $0) <ApplicationName>"
echo
exit 1
fi

AppInput=$1

if [ -d "$AppInput" ]; then
tempLoc=$AppInput
else
echo "Locating $AppInput"
tempLoc=$(find /var/mobile/Applications -iname "$AppInput.app")
if [ -z "$tempLoc" ]; then
echo "Unable to locate $AppInput"
exit 1
fi
AppCount=$(find /var/mobile/Applications -iname "$AppInput.app" | wc -l)
if [ $AppCount -gt 1 ]; then
echo "Found two installation directories:"
find /var/mobile/Applications -iname "$AppInput.app"
exit 1
fi
fi

AppPath=$(dirname "$tempLoc")
AppName=$(basename "$tempLoc")
AppExec=$(plutil -v CFBundleExecutable "$tempLoc/Info.plist" 2>&1 | awk -F "] " '{ print $2 }')
AppVer=$(plutil -v CFBundleVersion "$tempLoc/Info.plist" 2>&1 | awk -F "] " '{ print $2 }')
AppDisplayName=$(plutil -v CFBundleDisplayName "$tempLoc/Info.plist" 2>&1 | awk -F "] " '{ print $2 }')

if [ ! -d "$AppPath" ]; then
echo "Unable to locate original installation directory"
exit 1
fi

if [ ! -d "$AppPath/$AppName" ]; then
echo "Unable to locate .app directory"
exit 1
fi

if [ ! -e "$AppPath/$AppName/$AppExec" ]; then
echo "Unable to locate executable"
exit 1
fi

echo "Found $AppName"

echo "Creating directories"
WorkDir="/tmp/DecryptApp-$(date +%Y%m%d-%H%M%S)"
NewAppDir="$HOME/Documents/Decrypted"

if [ -e "$WorkDir" ]; then
rm -rf "$WorkDir"
fi

mkdir -p "$WorkDir"

if [ ! -e "$NewAppDir" ]; then
mkdir -p "$NewAppDir"
fi

if [ ! -d "$WorkDir" -o ! -d "$NewAppDir" ]; then
echo "Unable to create Directories"
exit 1
fi

echo "Copying application files"

cp -a "$AppPath/$AppName/" "$WorkDir/"

if [ ! -e "$WorkDir/$AppName/$AppExec" ]; then
echo "Unable to copy application files"
rm -fr "$WorkDir"
exit 1
fi

echo "Analyzing application"

CryptID=$(otool -l "$WorkDir/$AppName/$AppExec" | grep cryptid | awk '{print $2}')
if [ $CryptID -ne "1" ]; then
echo "Application is not encrypted"
rm -fr "$WorkDir"
exit 1
fi

CryptSize=$(otool -l "$WorkDir/$AppName/$AppExec" | grep cryptsize | awk '{print $2}')
if [ ! $CryptSize ]; then
echo "Unable to find CryptSize"
rm -fr "$WorkDir"
exit 1
fi

CryptOff=$(otool -l "$WorkDir/$AppName/$AppExec" | grep cryptoff | awk '{print $2}')
if [ ! $CryptOff ]; then
echo "Unable to find CryptOff"
rm -fr "$WorkDir"
exit 1
fi

echo "Locating and patching CryptID"

# "/System/Library/Frameworks" in hex
PathAsHex="2f53797374656d2f4c6962726172792f4672616d65776f726b73"

# - Convert to hex on 1 long line, only take stuff before the path string,
# - Convert to 1 byte set per line, find 0x01 (line number is offset in the real file),
# - Strip newlines, reverse the order
oneLocations=($(od -A n -t x1 -v "$WorkDir/$AppName/$AppExec" | \
tr -d ' ','\n' | \
sed "s/$PathAsHex.*\$//" | \
sed "s/../&\n/g" | \
grep -n -s 01 | \
cut -d : -f 1 | \
sort -nr | \
tr "\n" " "))

for TryOffset in "${oneLocations[@]}"; do
cp -a "$WorkDir/$AppName/$AppExec" "$WorkDir/$AppName/$AppExec.trying"
foo=$(echo -ne "\x00" | dd bs=1 seek=$((TryOffset - 1)) conv=notrunc status=noxfer of="$WorkDir/$AppName/$AppExec.trying" 2>&1> /dev/null)
cid=$(otool -l "$WorkDir/$AppName/$AppExec.trying" | grep cryptid | awk '{print $2}')
if [ $cid -eq 0 ]; then
break
fi
rm "$WorkDir/$AppName/$AppExec.trying"
done

if [ ! -e "$WorkDir/$AppName/$AppExec.trying" ]; then
echo "Unable to find CryptID"
rm -fr "$WorkDir"
exit 1
fi

mv "$WorkDir/$AppName/$AppExec.trying" "$WorkDir/$AppName/$AppExec"

echo "Dumping unencrypted data from application"

echo -e "set sharedlibrary load-rules \".*\" \".*\" none\r\n\
set inferior-auto-start-dyld off\r\n\
set sharedlibrary preload-libraries off\r\n\
set sharedlibrary load-dyld-symbols off\r\n\
handle all nostop\r\n\
break *0x2000\r\n
commands 1\r\n\
dump memory $WorkDir/dump.bin 0x2000 $(($CryptSize + 0x2000))\r\n\
kill\r\n\
quit\r\n\
end\r\n\
start" > $WorkDir/batch.gdb

foo=$(gdb -q -e "$AppPath/$AppName/$AppExec" -x $WorkDir/batch.gdb -batch 2>&1> /dev/null)

rm $WorkDir/batch.gdb

echo "Verifiying data dump"

DumpSize=$(stat -c%s "$WorkDir/dump.bin")
if [ "$DumpSize" != "$CryptSize" ]; then
echo "Memory dump is not the right size or does not exist"
rm -fr "$WorkDir"
exit 1
fi

echo "Replacing encrypted data with data dump"
foo=$(dd seek=4096 bs=1 conv=notrunc if="$WorkDir/dump.bin" of="$WorkDir/$AppName/$AppExec" 2>&1> /dev/null)
rm "$WorkDir/dump.bin"

echo "Signing the application"
foo=$(ldid -s "$WorkDir/$AppName/$AppExec" 2>&1> /dev/null)
plutil -s 'SignerIdentity' -v 'Apple iPhone OS Application Signing' "$WorkDir/$AppName/Info.plist" 2>&1> /dev/null

if [ -e "$WorkDir/$AppName/SC_Info" ]; then
echo "Removing SC_Info"
rm -fr "$WorkDir/$AppName/SC_Info"
fi

if [ -e "$WorkDir/$AppName/_CodeSignature" ]; then
echo "Removing _CodeSignature"
rm -fr "$WorkDir/$AppName/_CodeSignature"
fi

if [ -h "$WorkDir/$AppName/CodeResources" ]; then
echo "Removing CodeResources"
rm -fr "$WorkDir/$AppName/CodeResources"
fi

if [ -e "$WorkDir/$AppName/ResourceRules.plist" ]; then
echo "Removing ResourceRules.plist"
rm -fr "$WorkDir/$AppName/ResourceRules.plist"
fi

echo "Building .ipa"

mkdir -p "$WorkDir/Payload"
if [ ! -e "$WorkDir/Payload" ]; then
echo "Failed to create Payload directory"
rm -fr "$WorkDir"
exit 1
fi
mv "$WorkDir/$AppName" "$WorkDir/Payload/"

echo "Copying iTunesArtwork"

if [ -e "$AppPath/iTunesArtwork" ]; then
cp -a "$AppPath/iTunesArtwork" "$WorkDir/"
else
echo "Unable to find iTunesArtwork"
fi

echo "Compressing the .ipa"
IPAName=$NewAppDir/$(echo $AppDisplayName | sed -e "s: :_:g")-v$AppVer.ipa
cd "$WorkDir"
zip -m -r "$IPAName" * 2>&1> /dev/null
cd - 2>&1> /dev/null
if [ ! -e "$IPAName" ]; then
echo "Failed to compress the .ipa"
rm -fr "$WorkDir"
exit 1
fi

echo "Removing temporary files"
rm -rf "$WorkDir"

echo "Done"
echo "Created decrypted .ipa at $IPAName"


If you only want to manually get the decrypted binary for reverse engineering. Suppose the Application Executable is called AppExec and installed in /var/mobile/Applications. This is the script and using the gdb to dump the decrypted binary

Let's use a free app AdHoc Helper (by Erica Sadun) as example


otool -l `find /var/mobile/Applications -iname AdHoc` | grep cryptsize

output-> cryptsize 8192

# get the cryptsize say 8192

gdb `find /var/mobile/Applications -iname AdHoc`

(gdb) b *0x2000
Breakpoint 1 at 0x2000
(gdb) r
(gdb) x/20i 0x2000
(gdb) dump binary memory /var/root/dump.bin 0x2000 (0x2000+8192)
(gdb) kill
Kill the program being debugged? (y or n) y
(gdb) quit

cd /var/root/
cp `find /var/mobile/Applications -iname AdHoc` .
dd seek=4096 bs=1 conv=notrunc if=dump.bin of=AdHoc

Monday, February 2, 2009

How to install iLife 09 on Mac OS X 10.5.5

iLife 09 requires Mac OS X 10.5.6

If you want to install it in 10.5.5, you need to change the SystemVersion.plist

sudo vi /System/Library/CoreServices/SystemVersion.plist

and change this

<key>ProductVersion</key>
<string>10.5.5</string>


to

<key>ProductVersion</key>
<string>10.5.6</string>


You cannot change the SystemVersion.plist back after installation, as iPhoto 09 and iMovie 09 will check this when launch.

If you want iPhoto 09 to skip the check*, you need to use a hex editor
open and change this file
/Applications/iPhoto.app/Contents/MacOS/iPhoto
then find (do multiple finds) and replace 10.5.6 to 10.5.5 and save it

*this trick does not work on iMovie 09

Thursday, January 29, 2009

How to install iWork 09 on Mac OS X 10.5.5

iWork 09 requires Mac OS X 10.5.6, but I want to install it in my 10.5.5 machine and don't want to upgrade Mac OS

Here are the steps

(1) download iWork 09 Trial from Apple


(2) Use Disk Utility to convert the iWork09Trial.dmg into a read-write image file say iWork09.dmg

(3) Mount the newly created read-write image iWork09.dmg

(4) Use Terminal to enter the command

shell script: Select all


cd /Volumes/iWork\ \'09\ Trial\ Install\ DVD/Packages/iWork09Trial.mpkg/Contents/

vi iWorkTrial.dist


and change this

if (-1 == system.compareVersions(system.version.ProductVersion, '10.5.6'))


to

if (-1 == system.compareVersions(system.version.ProductVersion, '10.5.5'))


(5) Start the Installation from the mounted image

(6) After Installation completed

(7) Use Terminal to enter the command
shell script: Select all


sudo defaults write /Library/Preferences/com.apple.iWork09.Installer InstallMode -string 'Retail'


(8) Then start any iWork 09 application, it will ask you to register, click register later

(9) It will ask you three times after you close and then open any iWork 09 app, then the option of "never register" will appear. Proceed to click never register.

(10) In case you did not do step (7), it will ask you for the serial number, enter this
Y93U-HMME-3YRG-MOFO-MOFO-5S2

Enjoy.
.
.
.
.
.

Friday, January 16, 2009

redsn0w is coming

shell script: Select all


wget http://appldnld.apple.com.edgesuite.net/content.info.apple.com/iPod/SBML/osx/061-5358.20081120.Gtghy/iPod2,1_2.2_5G77a_Restore.ipsw

unzip -o iPod2,1_2.2_5G77a_Restore.ipsw 018-4056-128.dmg

vfdecrypt -k 148025cde5c51d51d7733e74c6857dfca70d7240287d6eb039a1ed835413120b0af1e296 -i 018-4056-128.dmg -o ipt2g_mainfs.dmg

Wednesday, January 14, 2009

Bushism


Don't misunderestimated me